I wasn't going to do a post today because I have been so sick lately. My whole weekend was ruined because I had a fever. It was terrible I won't tell you the details before you start to be sick as well... I was actually going to do a post on Sunday but who knew I was going to be sick. Still I posted one today because I promised you that I would have yesterday but if I did it yesterday then I would probably have been sick on my keyboard.....
So today (feeling much better) I will do a Diy and in fact 2! to make it up to you because I didn't post anything yesterday.
So enjoy.
So today (feeling much better) I will do a Diy and in fact 2! to make it up to you because I didn't post anything yesterday.
So enjoy.
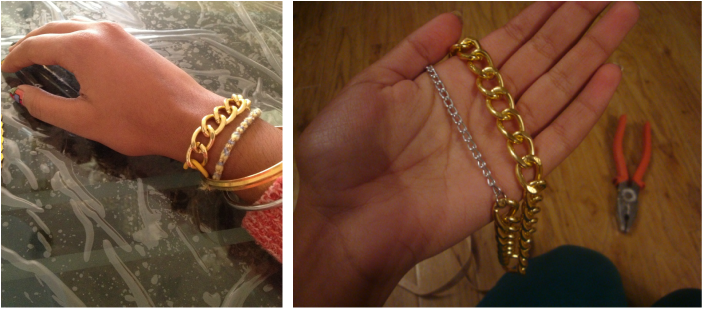
A few weeks ago I said I will show a diy of how to make a diy chain bracelet as I saw it somewhere online and it was quick and easy but then I went Primark shopping YAY and saw there lots of chain necklaces as well so I thought why not do that as well. If you get the bracelets part of it then then making the necklace wont even take you that long.
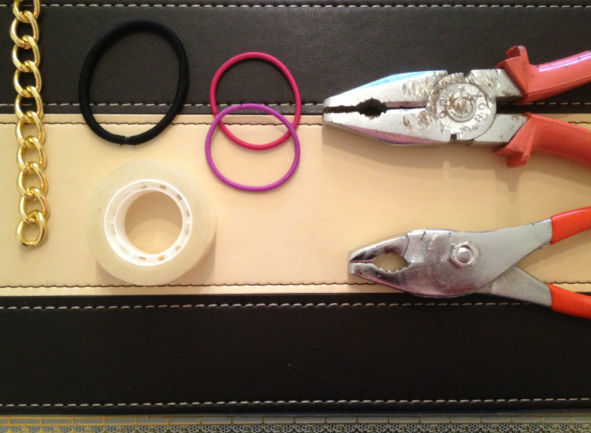
Anyways what you need first is all on this very big picture. If you want to make the necklace unfortunately you have to watch this tutorial first. The chain size depends on your wrist size and you can use what ever kind of rubber band that you want.
Anyways what you need first is all on this very big picture. If you want to make the necklace unfortunately you have to watch this tutorial first. The chain size depends on your wrist size and you can use what ever kind of rubber band that you want.
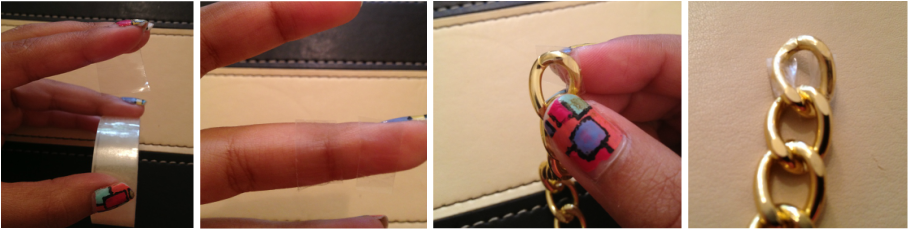
Get some cello tape and put it on both sides of the chain of where you will open it because that's how you will put the rubber band into those little circles (don't know what the shape is called). This will protect the circles from getting damaged.
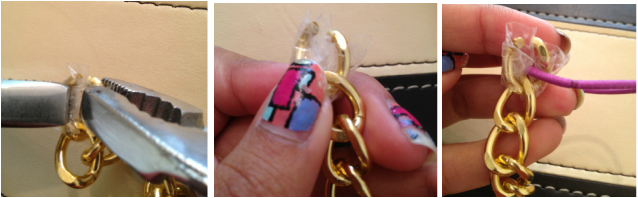
Then with the 2 clamps hold the tiny circle ( this is difficult because the circle kept falling). With one clamp push it away from you and then with the other one pull it towards you. Careful don't make a to big gap because eventually you need to close it afterwards. Then put the rubber into it and close this bit of the chain. Now open the other side of the chain...
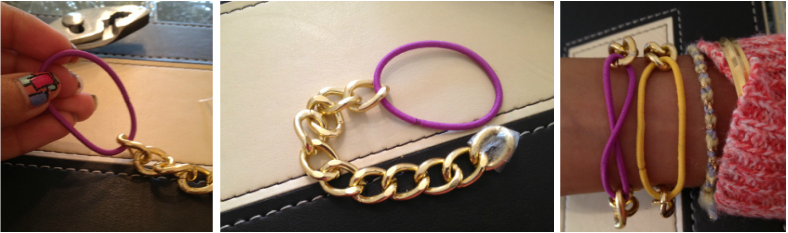
And put the rubber band in that circle as well. When done this you are finished. I have done 2, one rubber twisted and the other one is just straight. It actually went by accident but it looked nice so I left it. It doesn't matter how you do the rubber band because you are not going to see it anyways.
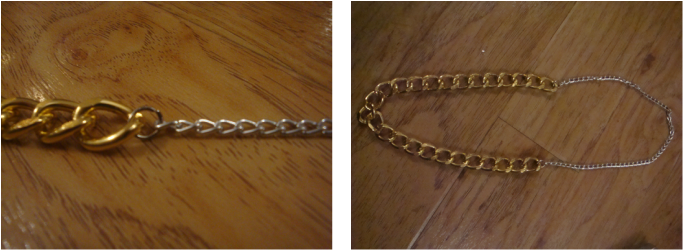
Then the last DIY the necklace! Which I think I will be absolutely in love with this season, as keep in mind, that rebel style. anyways for this you need that little tiny circle (and this shape is a circle) which is in the middle of the big gold chain and small silver chain on the first picture. You need 2 of the tiny circles. This time you will be opening those 2 tiny circles instead of the chain's circles and then putiing the little and big chain into the tiny circle and closing it afterwards. When done this it is finished!
What did you think of this tutorial?
Which one is your favourte?
What did you think of this tutorial?
Which one is your favourte?


 RSS Feed